Repairing the Damage: How To Repair Sink Cabinet Floor

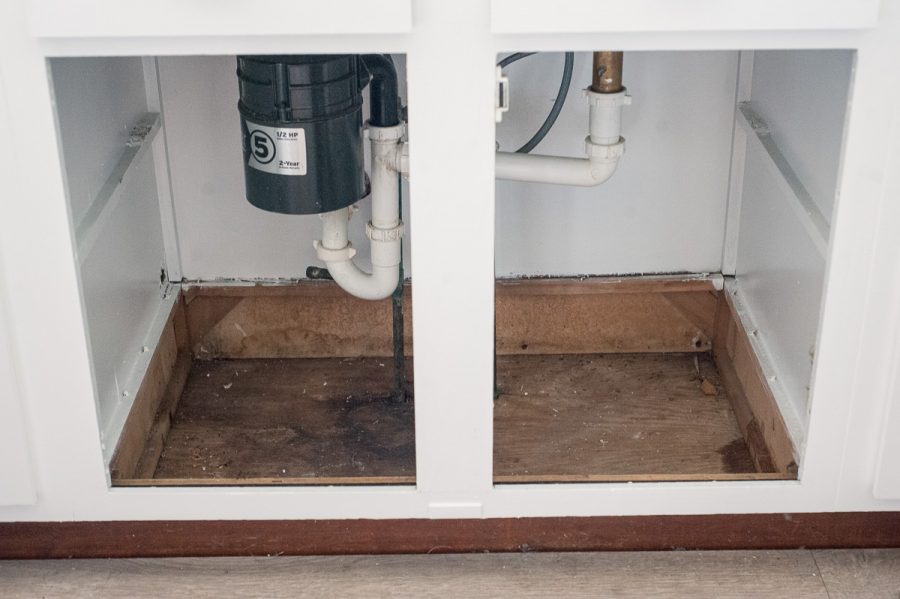
Repairing a damaged sink cabinet floor can be a straightforward process, depending on the extent of the damage. Minor scratches and dents can be easily fixed with a few simple tools and materials. However, if the damage is more extensive, replacing the entire floor might be necessary. Regardless of the severity, reinforcing the cabinet floor is crucial to prevent future damage.
Repairing Minor Damage
Minor damage, such as scratches and dents, can be repaired using wood filler or epoxy.
- Clean the Damaged Area: Remove any debris or loose material from the damaged area. Use a damp cloth to wipe away dirt and dust.
- Apply Wood Filler or Epoxy: Use a putty knife to apply wood filler or epoxy to the scratches or dents. Ensure the filler is pressed firmly into the damaged area and smooth out any excess.
- Sand and Finish: Once the filler has dried completely, sand the area with fine-grit sandpaper to smooth out any imperfections. Apply a wood stain or paint to match the existing cabinet floor finish.
Replacing Damaged Flooring
Replacing damaged flooring involves removing the old flooring and installing new material.
- Remove the Old Flooring: Carefully remove the damaged flooring panels or boards using a pry bar or hammer. Ensure you do not damage the surrounding cabinet structure.
- Prepare the Cabinet Floor: Clean the cabinet floor thoroughly and check for any structural issues. Repair any loose or damaged supports before installing the new flooring.
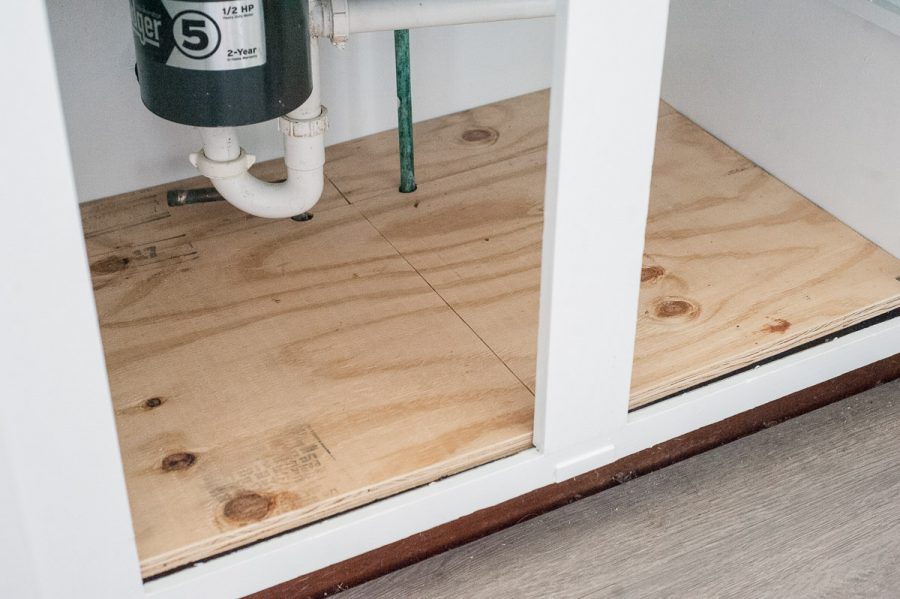
- Install New Flooring: Cut and install the new flooring material, ensuring it fits snugly and securely. Use appropriate fasteners or adhesives for the specific flooring type.
Reinforcing the Cabinet Floor
Reinforcing the cabinet floor is essential to prevent future damage.
- Add Support Brackets: Install additional support brackets underneath the cabinet floor to distribute weight more evenly. This is particularly important if the cabinet floor is sagging or weak.
- Use Thicker Flooring Material: Replace the existing flooring with thicker and more durable material, such as plywood or solid wood boards. This will provide greater strength and resistance to wear and tear.
- Apply a Protective Coating: Apply a protective coating, such as polyurethane or varnish, to the cabinet floor. This will help to prevent scratches, dents, and water damage.
Preventing Future Damage

How to repair sink cabinet floor – Now that you’ve repaired the damage, it’s essential to take steps to prevent it from happening again. A well-maintained sink cabinet floor can last for years, but neglecting it can lead to costly repairs. Here’s a guide to help you prevent future damage.
Preventative Measures, How to repair sink cabinet floor
To prevent future damage to your sink cabinet floor, consider these preventative measures:
- Regular Cleaning: Clean spills immediately to prevent them from seeping into the wood. Use a mild detergent and water to clean the floor, and dry it thoroughly afterwards.
- Avoid Excess Moisture: Ensure the sink faucet doesn’t leak, and promptly address any plumbing issues. Keep the area well-ventilated to reduce humidity.
- Proper Storage: Store heavy items on shelves or in drawers to minimize stress on the floor. Avoid placing items directly on the floor, as this can lead to wear and tear.
- Protective Coatings: Apply a waterproof sealant or varnish to the floor to protect it from moisture and spills. This will help prevent water damage and make cleaning easier.
Materials and Tools
Here are some materials and tools you can use to protect your sink cabinet floor:
- Waterproof Sealant: A sealant like polyurethane or epoxy can create a protective barrier against water and spills. It’s important to choose a sealant specifically designed for wood surfaces.
- Protective Mats: Placing mats under heavy appliances or in high-traffic areas can help prevent wear and tear. Choose mats made from durable materials like rubber or vinyl.
- Ventilation System: Ensure proper ventilation in the bathroom to reduce humidity. This can be achieved by installing a vent fan or opening a window during and after showers.
Installing Protective Measures
Installing protective measures is relatively simple. Here’s a visual guide illustrating the process:
Applying Waterproof Sealant:
1. Clean the floor thoroughly and allow it to dry completely.
2. Apply the sealant according to the manufacturer’s instructions. This may involve using a brush, roller, or spray application.
3. Allow the sealant to dry completely before placing any items on the floor.
Installing Protective Mats:
1. Measure the area where you want to place the mat.
2. Cut the mat to size if necessary.
3. Place the mat in the desired location.
4. Ensure the mat is flat and secure to prevent slipping.
The constant dripping from a leaky faucet can wreak havoc on a sink cabinet floor, leaving behind a soggy mess that’s ripe for mold and mildew. Replacing the damaged flooring is a necessity, but don’t forget about the aesthetic appeal of the rest of your kitchen.
Consider upgrading your storage solutions with white kitchen storage cabinets to complement the newly repaired floor. After all, a well-organized and aesthetically pleasing kitchen is a joy to work in, even if you’re dealing with the unfortunate reality of a leaky faucet.
Repairing a sink cabinet floor can be a tedious process, but it’s crucial for maintaining a functional and aesthetically pleasing kitchen. While you’re tackling the repairs, consider the overall design scheme. If you have cherry cabinets, you might want to explore what color flooring complements them best.
This article offers some insights on color combinations, but ultimately, the choice is yours. Once you’ve decided on the flooring, you can complete the sink cabinet repairs with confidence, knowing the new flooring will enhance the overall look of your kitchen.